Manage apps and extensions
Use Business+ → Apps & Extensions for signed-in users and managed guest sessions. Use Kiosk → Apps for kiosk auto-launch and kiosk apps.
Choose the correct scope
| Target | Console location |
|---|---|
| Managed users and browsers | Business+ → Apps & Extensions → Users & Browsers |
| Managed guest sessions | Business+ → Apps & Extensions → Managed Guest Sessions |
| Kiosk devices | Kiosk → Apps |
| Private APK library | Private Android Apps |
The Kiosk tab under Business+ is a pointer to Kiosk → Apps; it is not a separate app list.
Add an app for users or managed guest sessions
- Open Business+ → Apps & Extensions.
- Select Users & Browsers or Managed Guest Sessions.
- Select the target Organisational Unit.
- Click Add.
- Choose Chrome app or extension, IWA app, Web app, or Android app.
- Select the app and set its Installation Policy.
- Review the list and click Save.
The current console includes policies such as:
- Allow Installation
- Block
- Force install + pin to taskbar
- Force install + pin to toolbar
Available choices depend on the app type and target.
Change or remove an app
- Select the correct tab and organisational unit.
- Change the Installation Policy, or click Delete for the app row.
- Review Unsaved Changes.
- Click Save.
- Verify removal or policy change on a pilot device.
Deleting a row removes its managed configuration from that scope. Whether an already installed app remains depends on its installation policy and device state; test before broad rollout.
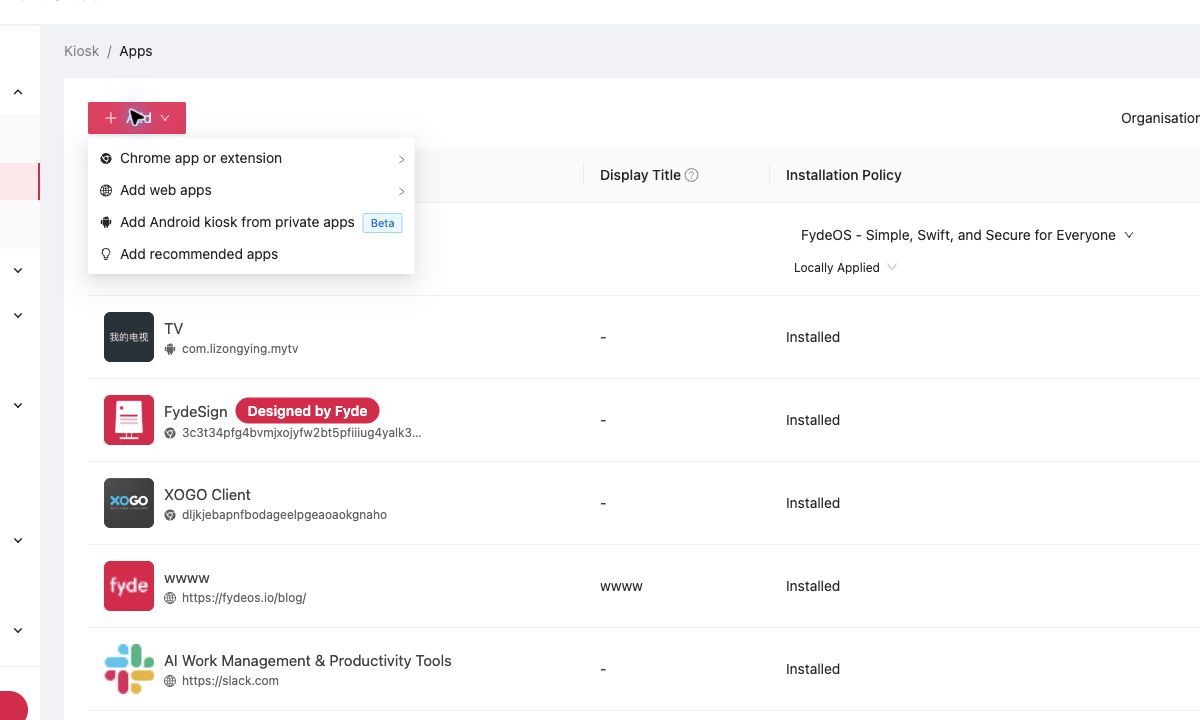
Add a kiosk app
- Open Kiosk → Apps.
- Select the target organisational unit.
- Click Add.
- Choose:
- Chrome app or extension
- Add web apps
- Add Android kiosk from private apps
- Add recommended apps
- Add the app.
- In the Auto-Launch App row, select the one app that should launch when the kiosk starts.
Upload a private Android app
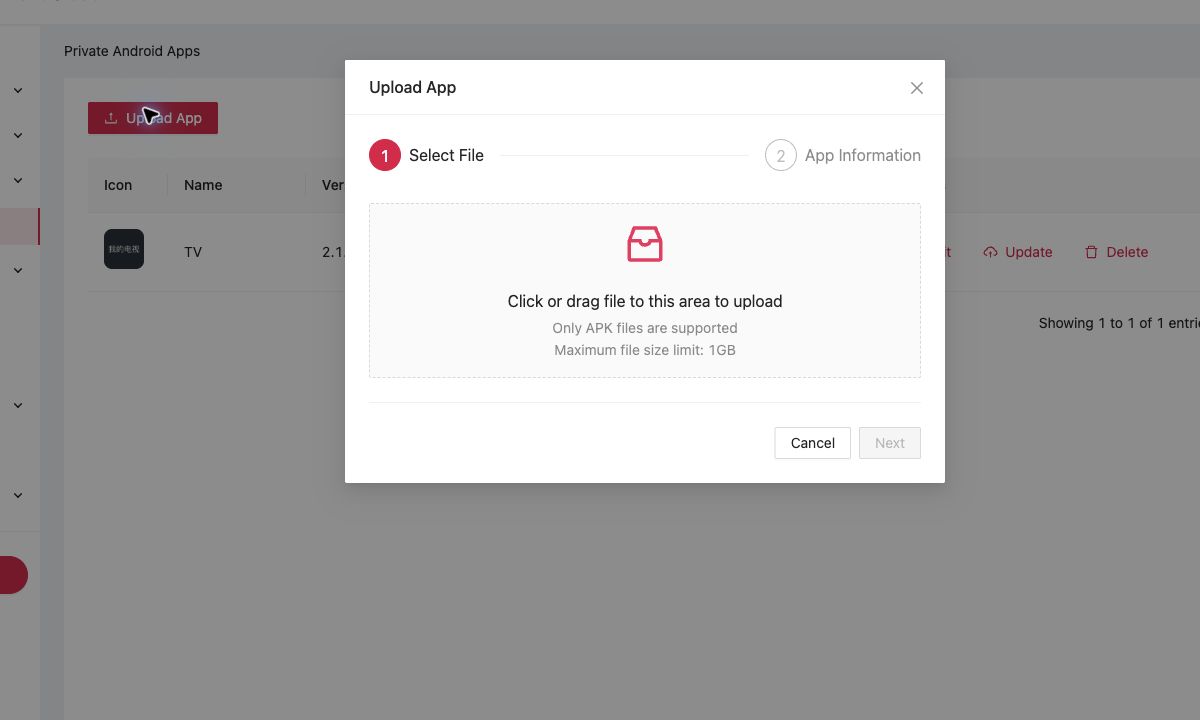
- Open the top-level Private Android Apps page.
- Click Upload App.
- Select or drag an APK file. The current uploader accepts APK files up to 1 GB.
- Continue to App Information, review the detected metadata, and finish the upload.
- Return to the relevant app policy page and add the private app to users or kiosks.
Use Update to upload a newer build of an existing private app. Confirm package identity and version before updating; changing the package name creates a different app.
Manage global app permissions
Click Other Settings on the Users & Browsers tab to configure:
- Chromium and Android allow/block mode.
- Allowed app and extension types.
- App and extension installation source URL patterns.
- Insecure or external extension handling.
- Permissions extensions are not allowed to request.
- Runtime blocked and allowed hosts.
- Whether the Chrome Web Store icon is shown.
These settings can affect many apps at once. See Manage App Permissions and Sources before changing them.
Verify deployment
- Use a pilot organisational unit.
- Keep the test device online.
- Confirm that the app appears and its installation policy is correct.
- For a kiosk, restart the device and confirm that the selected auto-launch app opens.
- Expand the policy only after the pilot succeeds.
If an app does not appear
- Confirm the correct tab and organisational unit.
- Confirm that you clicked Save where the page requires it.
- Check that the device and user are in the expected units.
- Check app compatibility with the device and FydeOS version.
- For a private APK, confirm that upload completed and the expected package/version is listed.
- Check Other Settings for an allow/block mode, app type, source, permission, or runtime-host rule that prevents the app from operating.
What's next
- App permissions and sources, control what managed apps can install or access.
- Configure user policies, apply related browser settings.